Service request management in four steps
Shorten order management workflow:
Step 1: Send service request acknowledgement
Step 2: Quote and convert to Order
Step 3: Schedule services
Step 4: Invoice and close order transaction
/!\ Points of caution
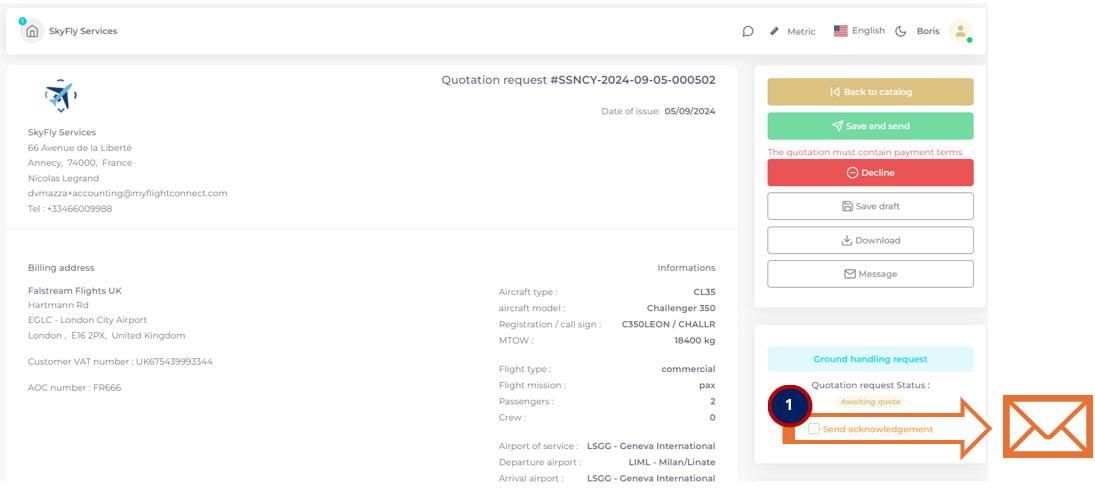
Step 1: Send service request acknowledgement
This step allows to confirm that the request will be taken in charge, before engaging and quoting an order.
Send acknowledgement email by ticking the box in the Quote status section of the order.
/!\ The acknowledgement must be reconfirmed in case of schedule change or service request update
/!\ The acknowledgement tag remains only with Order status “Awaiting Quote” and disappears afterwards (when becoming a validated quotation or an order)
The acknowledgement email message is distributed to The Customer Operations Contact as main recipient and to the Service Provider Operations contact in a copy
Link to dedicated page: Acknowledgement of Service Request
Step 2: Quote and convert to Order
This step validates the quotation and enables to convert to a validated order.
Complete your quotation, that will be transformed to Order
The quote lines can be freely modified, added or deleted.
Three conditions have to be met to enable SAVE & SEND button (highlighted by red alert message when missing):
A quote cannot be created at zero value.
A quote cannot be created without seller payment terms.
There is unsaved quote line, a floppy disk icon must be clicked to finalize.
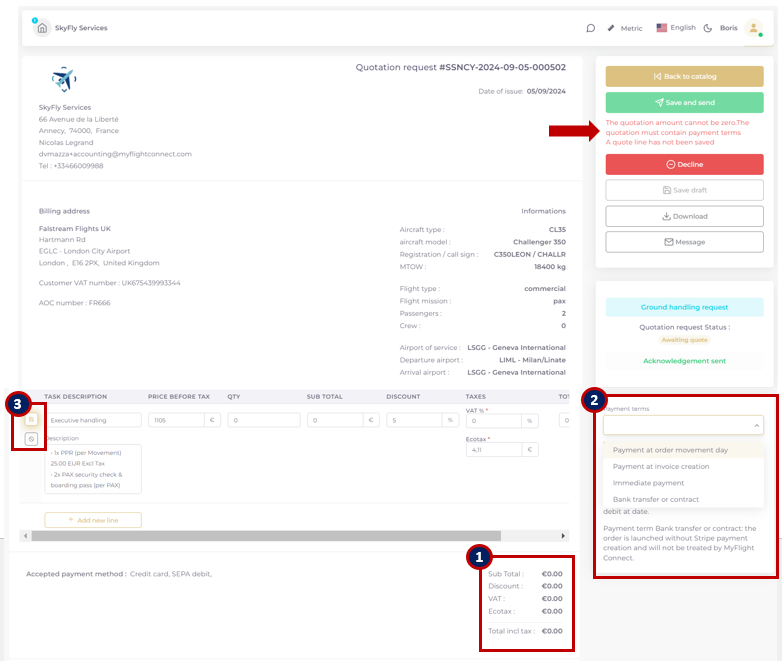
/!\ PAYMENT TERM “Bank transfer or contract” doesn’t engage a Stripe payment and allows to the Service Provider to go up to the end of the transaction, without waiting any further customer validation.
/!\ Service providers than have not created a Stripe Vendor account to receive payments could use only the payment term “Bank transfer or contract”
While still in “Awaiting Quote” status, the quote could be modified at any time.
Convert to Order
This step allows to the Service provider to convert to validated order without waiting for Quotation acceptance by the Customer (for customers working on contact or Ground Handling purposes).
From the Quotation request, click to SAVE & SEND to open the submission window. Then tick the box CONVERT TO ORDER 4).
An email containing the Order is distributed to the customer. A personalized message and other attachments could be added to the email, 5) 6).
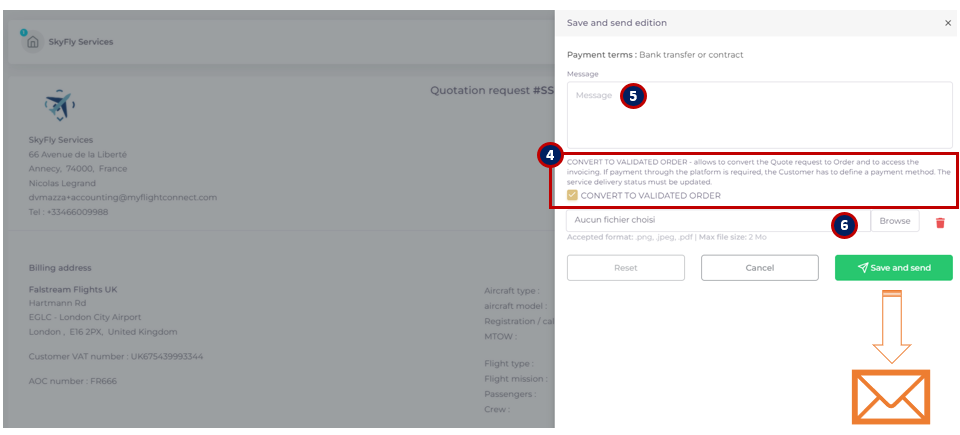
/!\ If the CONVERT TO ORDER is not configured at this step, the customer must accept first the quotation to enable the Service provider to proceed to invoicing.
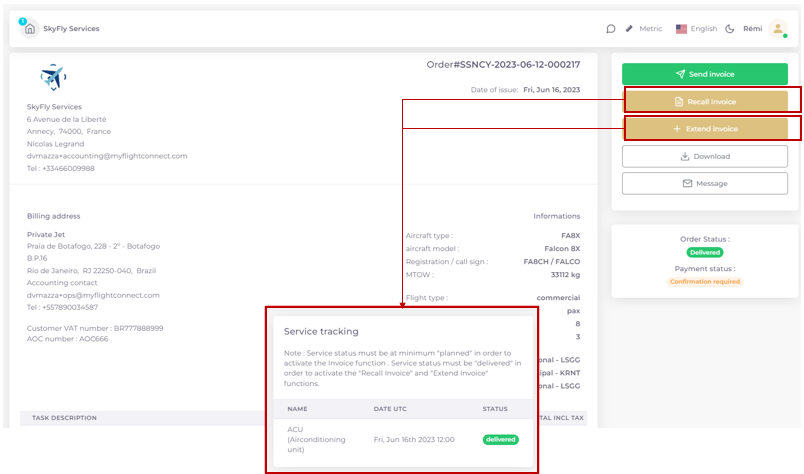
Step 3: Schedule services
This step allows to confirm the service implementation and unlocks the invoicing.
SERVICE TRACKING module in the button of the order page: Upgrade the service status from “Not planned” to unlock the invoicing button.
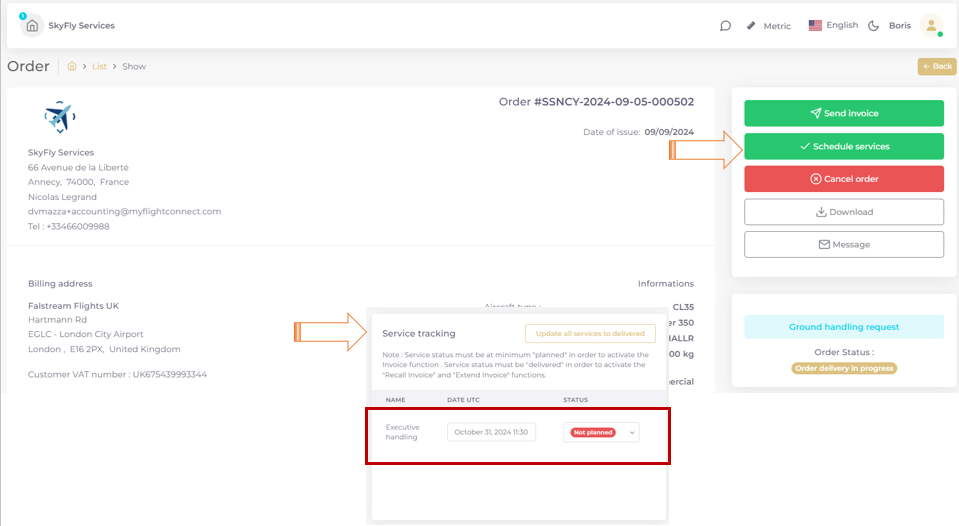
/!\ Status ORDER DELIVERED is not reversible (all services delivered). An ORDER status DELIVERED cannot be cancelled neither by the Customer, nor by the Service provider.
The button MODIFY INVOICE allows to readjust the order amount before converting to invoice. ENXTEND INVOICE allows to create a complementary order for last minute services.
/!\ The service status must be at minimum PLANNED to unlock the “SEND INVOICE” button.
Link to page: Order creation and order change management
Step 4: Invoice and close order transaction
This step allows to close the order by proceeding to invoice and close
To send an imported invoice from external system, click on SEND INVOICE and:
tick 1), SEND AN EXTERNAL INVOICE.
Attach the imported INVOICE document 2).
Fill in invoice N°, date of issue and amount 3)
Add personalized message 4)
The email is sent to customer’s accounting and kept in MyFlight Connect Order as pdf.
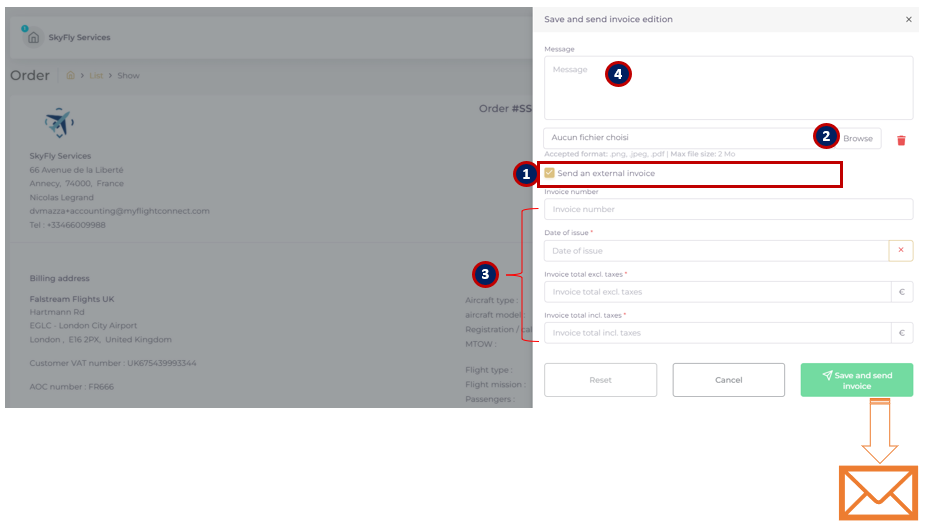
/!\ The same imported invoice document could be used for more than one Order, no restriction.
To convert the MyFlight Connect Order to Invoice, just prepare your personalized message and send without ticking the external invoice box.